From Shadecard recipe to lab dip: test, log and correct
In short
Save the measurement, dye a small swatch from the calculator's stock volumes, measure the dried dip, then Log dip with the outcome and correction. Promote a proven recipe to My shades.
On this page
A Shadecard recipe is where the lab dip begins, not where it ends. Save the measurement, work out small amounts in the calculator (the Stock (mL) method is made for this), dye a swatch, measure the dried dip, and record what happened with Log dip. When a recipe is approved, promote it to My shades so the app matches future cloth against your proven recipe.
1. Save the measurement
On the result, choose your fibre under Fiber & dye type, then tap Save measurement. The button changes to Saved to My measurements ✓. The reading, matched shade, fibre and recommended depth are stored on the phone.
2. Work out the dip amounts
Tap Work out the amounts, set Fabric weight (g) to your swatch weight (for example 10 g) and the liquor ratio you use in the lab, then switch the method to Stock (mL). The calculator gives mL of each stock solution to pipette, the water to top up, and salt and soda ash in grams.
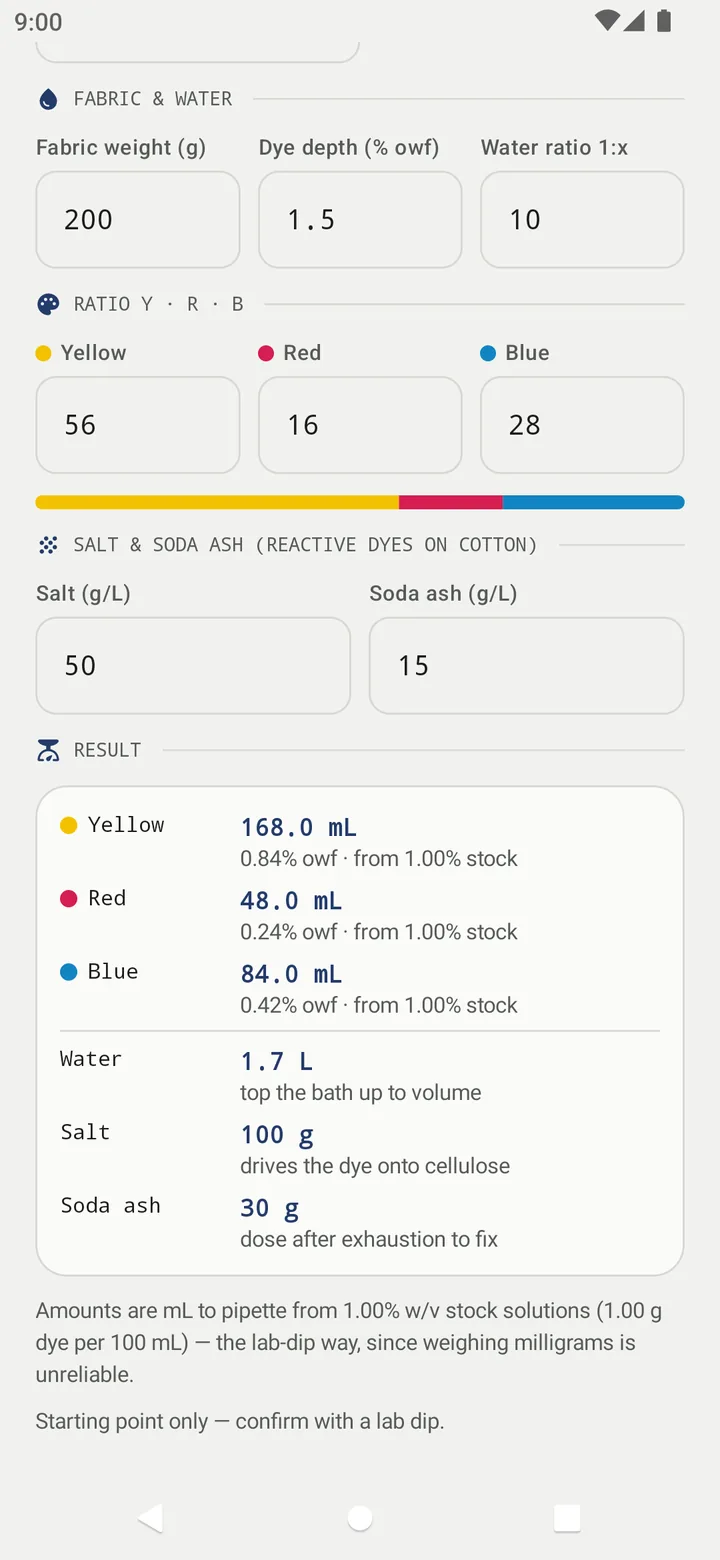
Pale shades give small volumes; a weaker stock (0.1%) makes them easier to pipette accurately. See How to make and use a dye stock solution.
3. Dye the dip under controlled conditions
Use the same fabric (same pretreatment), the same dye lot, and the liquor ratio, temperature and time you would use in bulk. Rinse, soap off unfixed dye as your dye class requires, and dry the swatch before judging it – wet cloth looks darker.
4. Judge the dip
- By eye, next to the target in good daylight, and under the other lights the garment will be seen in.
- With Shadecard: capture the dried dip exactly as you captured the target (same reference, same light) and Save measurement. You can then use that reading as the dip's measured result.
5. Log the dip
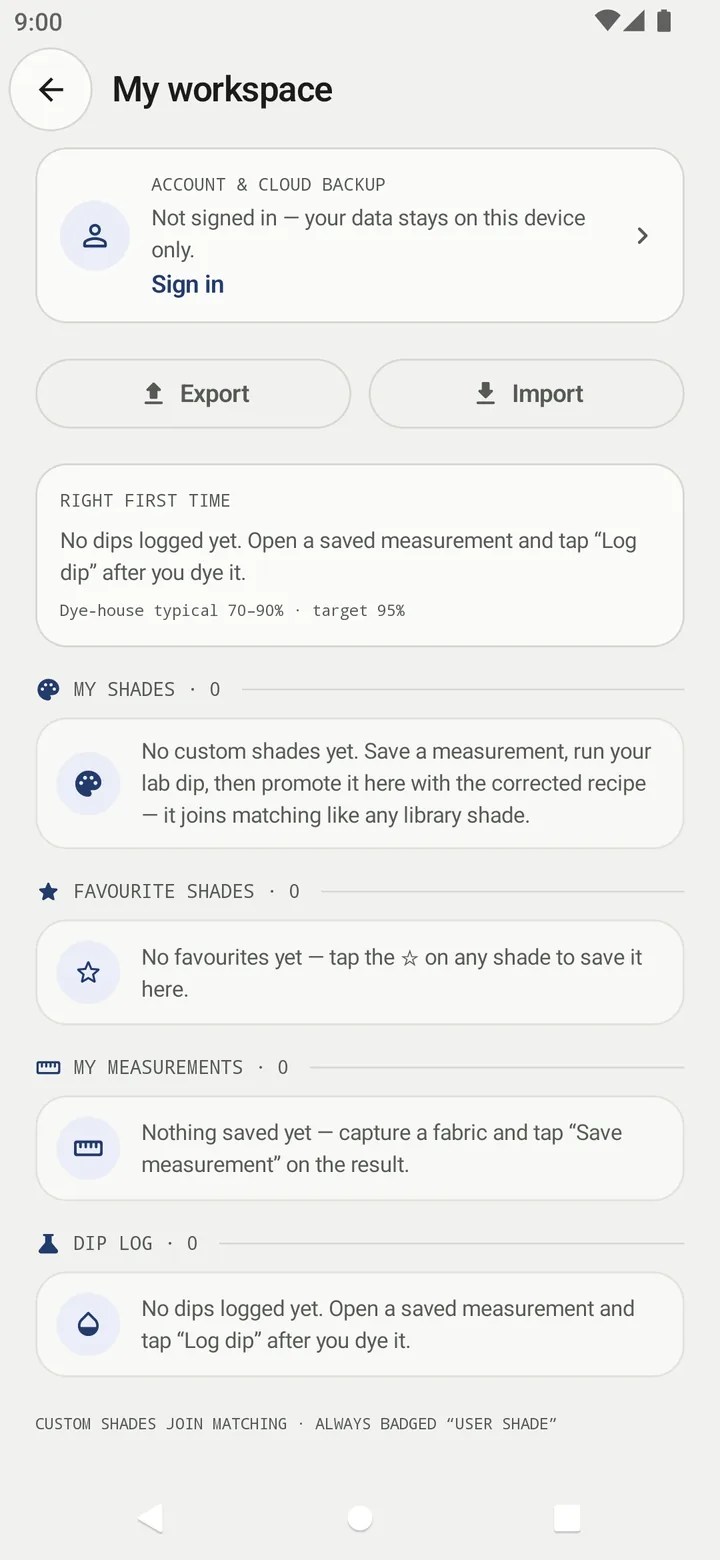
- Open My workspace from the home screen.
- Under My measurements, find the target reading and tap Log dip.
- In How did the dip go?, choose the Outcome: Approved first time, Approved after correction or Rejected.
- Optionally, under Measured result, pick the saved reading of the dyed swatch. The app records an objective ΔE between target and dip.
- If you corrected the recipe, enter Correction applied (ratio points) for Y, R and B and a Depth × multiplier.
- Optionally fill Process: Liquor ratio 1:, Temp °C, Time min, Substrate and Notes.
- Save.
The dip appears under Dip log, and the Right first time card at the top of My workspace starts counting: the share of dips approved first time over 30 days, 90 days and all time, with an 8-week trend.
6. Let the app learn your process
Once you have logged at least three dips for a dye class and shade family, new results in that family show Adjusted from your last n dips in this dye class and family and apply your average correction. A switch, Use my dip history, turns it off to show the library recipe. Rejected dips never teach the app. With enough dips that carry a measured result, the result can also offer Also try: learned from your dips.
7. Promote the approved recipe
- In My measurements, tap Promote on the reading.
- In Promote to custom shade, give it a name and enter the recipe that actually hit the colour: Y, R, B and % owf.
- Tap Save.
The shade appears under My shades, joins matching like any library shade, and is always badged user shade so you know it is yours.
Related
Frequently asked questions
Why can't I dye the bulk straight from the app's recipe?
The library colours are illustrative and every dye range, fabric and machine behaves differently. A small lab dip shows the real result for a fraction of the cost of a failed batch.
What does logging a dip do?
It records the outcome and correction. After three dips in a dye class and shade family, the app starts adjusting its recipes to your process; a switch on the result shows the untouched library recipe.
How do I get an objective ΔE for my dip?
Capture the dried dyed swatch with the app and save it, then pick that measurement under Measured result when you log the dip.
What is a custom shade?
A saved measurement promoted with the recipe that actually hit the colour. It joins matching like any library shade and is always badged user shade.
Was this article helpful?
Related articles
- Use the recipe calculator: grams, stock solution or pad liquorEnter fabric weight, depth (% owf), water ratio and the Y:R:B ratio. Pick Weigh (g), Stock (mL) or Pad (g/L); the calculator gives each dye plus bath volume, salt and soda.
- Understanding the trichromatic recipe (Y:R:B and % owf)A Shadecard recipe has two dials: the Y:R:B ratio sets the hue, the % owf sets how deep. Choose the fibre on the result to see the dye class; confirm everything with a lab dip.
- Take your first fabric colour reading, step by stepTap Capture dress color, keep White paper selected, lay the paper in the small dashed box and fill the big box with flat fabric, then tap the shutter once and hold still.
- Shadecard explained: what it does and who it is forShadecard measures a fabric's colour with a phone camera, matches it to a library of 13,297 shades and gives a yellow:red:blue starting recipe to confirm with a lab dip.
Need a hand?
Email us what you see on screen — a screenshot helps — and we'll walk you through it.